Rig Controls
Bind the knobs, expression pedal, and MIDI to the parameters you want under your hands and feet, with per-target ranges and curves.
A Rig Control enables you to assign one or more device parameters to a single “macro” control, which appears on the main rig screen. Bind a knob to the amp’s gain, and that knob is gain whenever this rig is loaded. The dock holds five knobs per page and adds more pages as you assign more than five controls, reachable by swiping the dock left or right. Rig Controls, along with the expression pedal and MIDI assignments alongside them, are saved with the rig.
Creating a Rig Control from the Dock
On the parameter dock, tap any empty slot to add a new rig control. Choose a device from the current rig’s chain, or System for the main output, then pick the parameter you want. The picker lists the device on the left and its parameters on the right. The knob now turns that parameter, labelled with the device and parameter, for example “Amp: Gain”.
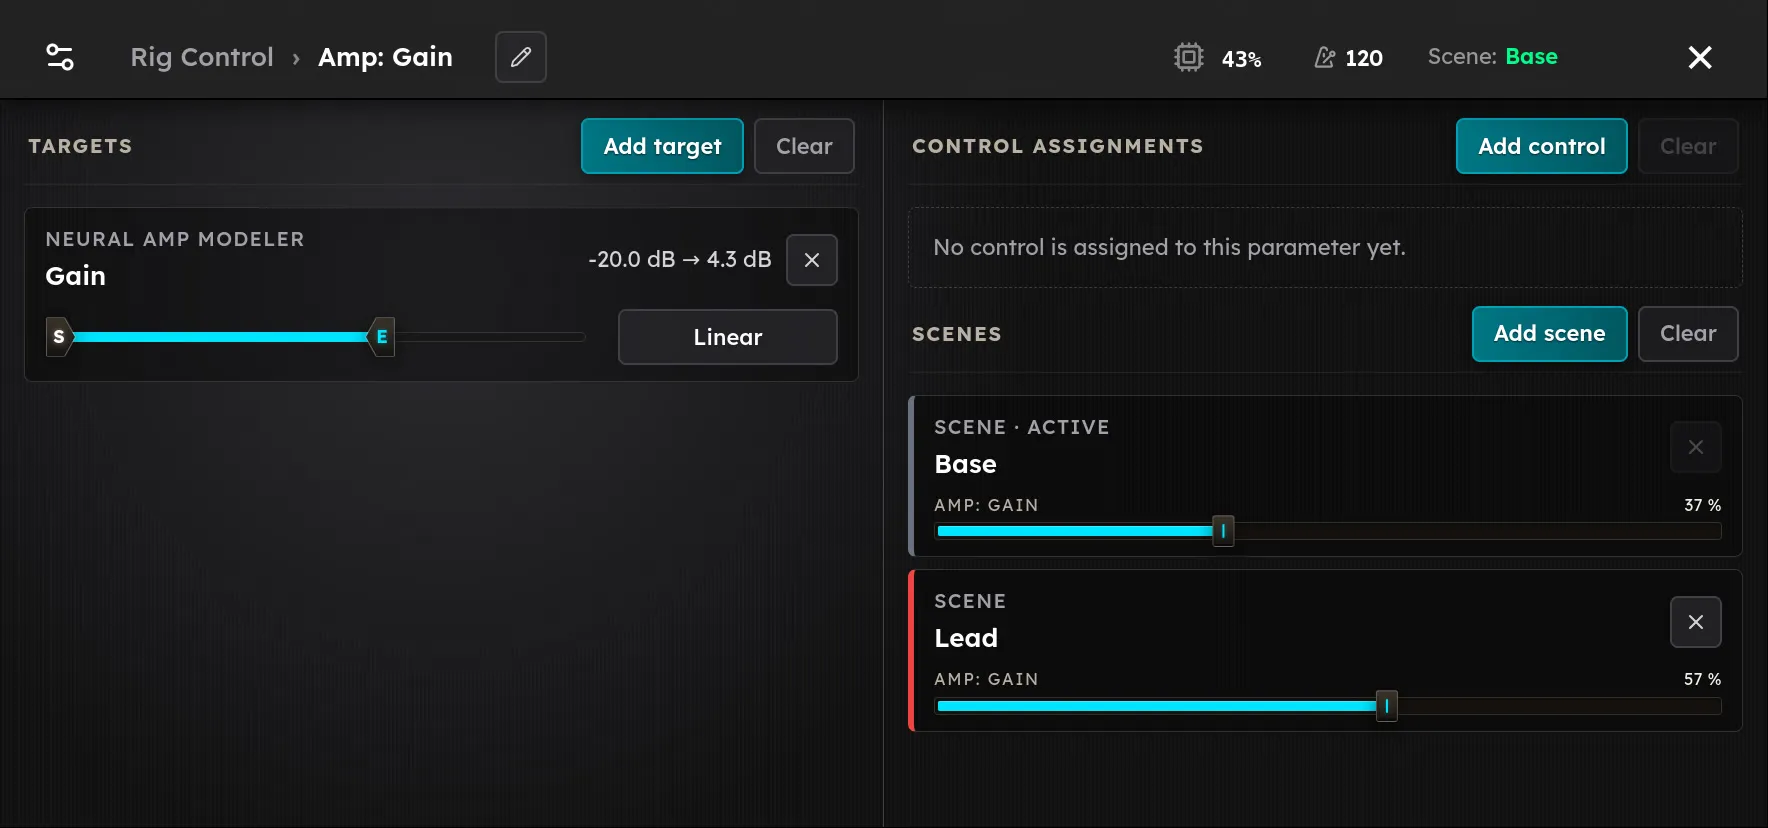
The screen for a single knob is titled Rig Control. The section that lists what a control drives is Control Assignments.
To change a slot later, open it and tap Change. To empty it, use Clear or Delete Rig Control.
Creating a Rig Control from the Parameter Screen
Any parameter can be turned into a rig control. From the Parameter Editor, choose Add control > Rig Control to add the parameter to the rig controls and the main dock.
Macros: more than one target
A Rig Control can adjust multiple parameters at once, for seamless blending between sounds. On a control’s screen, tap Add target to add a second parameter, then a third, and so on. Every target has its own range and curve: tap the sliders icon on a target to set where the knob’s sweep starts and ends and how it gets there. By default a target covers its whole range. A control with one target reads that parameter’s own value; with more than one target it becomes a macro, the knob itself reads 0 to 100 %, and each target follows its own range and curve as the knob sweeps.
This is how you build a single performance knob that for example, opens up a reverb’s mix while backing off a delay’s feedback at the same time.
Ranges and curves
Every target has a Start and an End value, so you decide how far along the parameter the control travels and in which direction. Set Start above End for an inverted sweep, or set them equal to pin the parameter to a fixed value.
Each target also has a response Curve that shapes how knob or pedal travel maps to the parameter:
- Linear: even travel across the range.
- Logarithmic: finer control low, faster up top, useful for a smoother volume swell.
- Exponential: the opposite weighting.
The System output
Choose System in the target picker to reach the unit’s main Volume, the overall output level. Knob E is bound to it out of the box; see Controls.
Control sources: the expression pedal and MIDI
Beyond the knobs, a parameter can be driven by the expression pedal or by a MIDI control change. On a parameter’s Control Assignments, tap Add control and choose a tile:
- Rig Control: an encoder dock slot, as above.
- Exp. Pedal: a pedal on the EXP jack, sweeping the parameter from heel to toe. Its range endpoints are labelled Heel and Toe rather than Start and End.
- MIDI: a control change message. Tap MIDI Learn and move a knob or pedal on your controller to capture its port, channel, and CC, or enter the CH and CC by hand and tap Use.
One source can drive several parameters. Each mapping it holds keeps its own range and curve, so one pedal or one CC can move a handful of parameters differently at the same time. See Connections for the EXP jack.
Control Mappings
For the whole picture in one place, open Control Mappings from the main menu. It lists every Rig Control, every Expression mapping, and every MIDI mapping the rig carries, so you can review and edit them without hunting across device screens. Tapping a knob or dock slot on the rig screen jumps you to that one control; Control Mappings shows them all together.